Usually, it is said that change the chain and sprocket in a set so that they don't indulge in each other wearing out. It can be a bit over 10k miles on your OEM chain so far, and though you've done your best to lube and tension your chain correctly, there might have been times when you've forced your machine to run a bit longer between re-lubrication.
This can sometimes result in you being hearing some squeaking from the chain at low speeds, and whenever you roll the bike forward by hand or pull the clutch while coasting to a stop, there can be certain vibration, coupled with a clicking sound like freewheeling. So, is it time to change your chain or your chain sprockets?
Table Of Content:
Motorcycle worn Chain Sprocket symptoms & wear guide
The easiest way to check for wear symptoms is to grab the chain at the rear sprocket's rearmost part and try to pull the chain away from it. A brand-new chain won't budge at all, and the general rule for ones that move is that if you can see half a tooth's depth showing, it's time to shop for a new chainset.
Also, it must be noted that drive chains don't "stretch". They wear a bit at each roller, so the chain gradually becomes longer/a different pitch, i.e., there's more distance between each link due to the wear. The chain sprockets don't wear that way, and if the chain gets too long, the load imposed on the sprocket is applied to only the last few teeth instead of the entire sprocket/chain engagement. This is why sprockets get hooked teeth when the chain gets old.
If the chain is relatively new, it still has the same pitch as the sprocket is engaged, and pulling the chain away from the sprocket results in little or no movement. If the chain is getting tired, all those added clearances in its' rollers and bushings make the chain pitch (distance between links) grow a bit, enough so pulling on the chain can move noticeably away from the sprocket. If near to half a tooth difference shows with this method, it's time to shop for a new chainset.
How long does a motorcycle chain & sprocket last or when to replace?
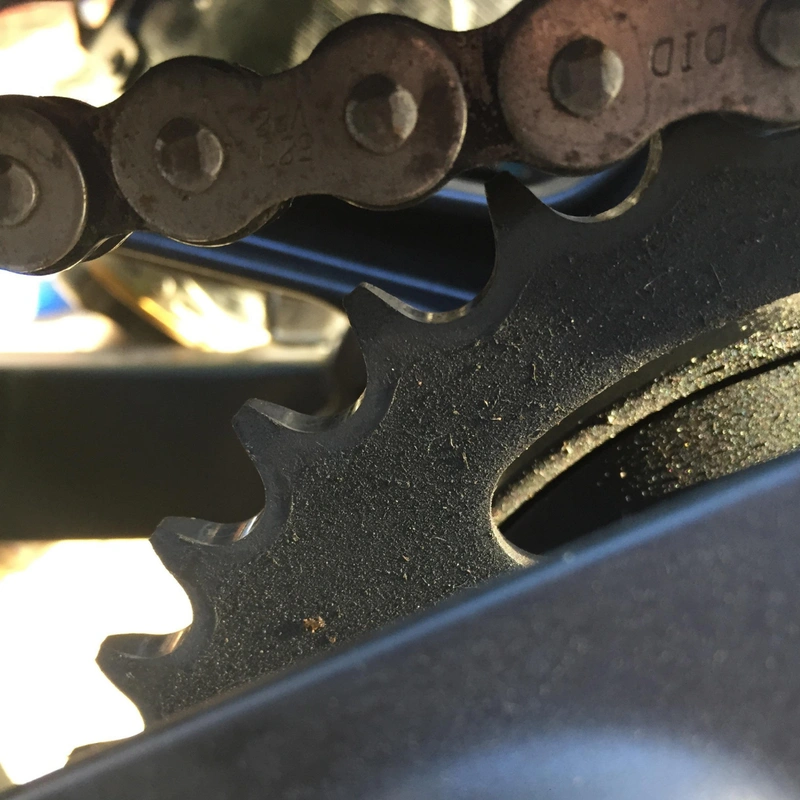
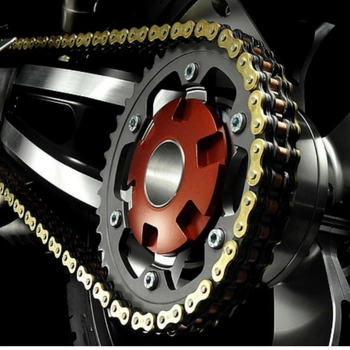
The above image is not of a worn out sprocket. It still has life in it.
Keep in mind that worn sprockets will accelerate chain wear and vice versa. So, if you're going to spend $100+ on a good quality O-ring chain for your motorcycle, a set of sprockets might be worth it too. On a road bike with reasonable care and use, you only need to change them in pairs (most mechanics will advise this).
For off-road motorcycles, it's different because the chains aren't O-ring (or most aren't), so they wear quicker. So you might get several chains out of one set of sprockets. But if you use aluminium sprockets on a dirt bike, your chain could last several aluminium rear sprockets).
Your sprockets and chain are typically changed as a pair with 520 chains lasting up to 25,000 km and 530 chains 40,000 km if you keep clean and lubricated every 500 km.
If you use aluminium rear sprockets, they can wear quite quickly so change as necessary when you see wear on the sprocket tooth's drive side compared to the idle side.
To start with the chain, you need to gauge how much it has "stretched". There are several ways of doing this. The "correct" way is to take it off and measure the length. It should be a certain length depending on how many links it has (the pitch multiplied by the number of links). The quick and easy way is to try and pull the chain off the back of the sprocket.
A more exact way is to check the chain by measuring ten links and compare to the allowable stretch for your series of the chain as a wear limit.
The sprocket has to be nasty to hurt the chain. The main thing is that the teeth will eventually break off and strand you/chain come off.
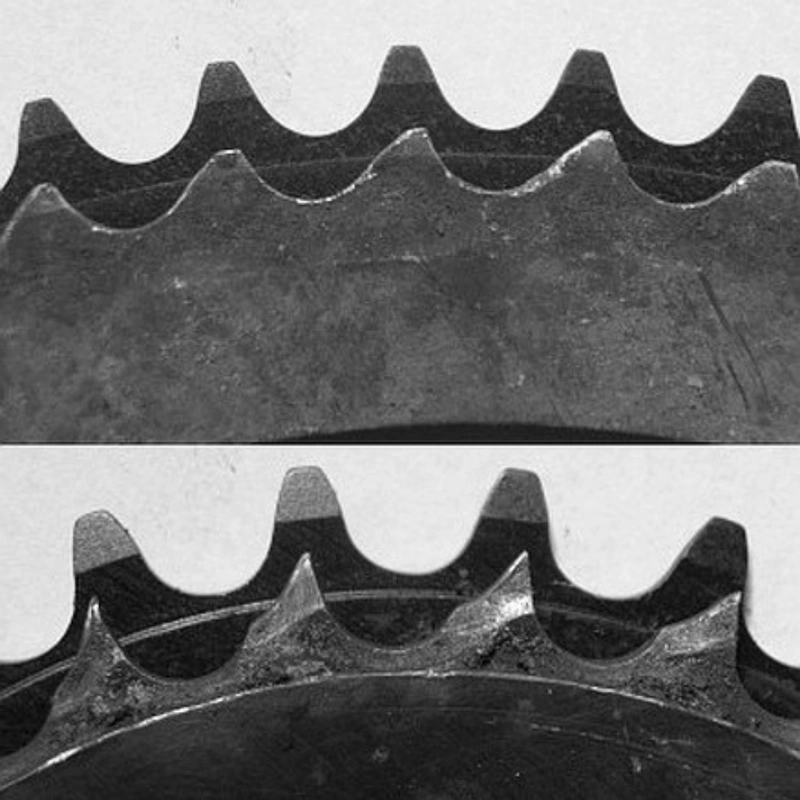
The opposite, however, is true. A lousy chain will ruin new sprockets in short order. The pitch on a worn-out chain is effectively more extended, so it climbs the teeth and eats them off fast. It's essentially running the wrong sized chain for your sprockets.
Best Motorcycle Chain Cleaners & Degreasers
- WD-40 All Conditions Bike Chain Lube and Chain Degreaser - Buy now
- Maxima Synthetic Chain Guard Aerosol - Buy now
- Bike Brite MC44 Motorcycle Spray Wash Cleaner and Degreaser - Buy now
- Meguiar's Motorcycle Care Kit For Cleaning and Detailing - Buy now
How to change or maintain chain sprocket on motorcycle
Basically, if there is not enough wear as per the methods given above. In that case, you can start with a thorough degrease, brush cleaning of the O-rings, and rag wipe down of the entire chain and rear sprocket.
It would be best if you sprayed a new lube specifically aiming for each O-ring and section of the sprocket. Then let things dry for over 30 minutes, and take the motorbike out for a ride. If they are making a squeaking sound due to under-maintenance, the noises/vibrations will disappear.
If you are worried about how hard it is to replace the chain and sprockets on your motorcycle with essential tools that come with the bike (under the seat). This might be a disappointment, but you need to have access to more tools and even have to buy some. With that being done, the rest is a bit easy and will take around 1-2 hour of your time.
Tool wise, you will need, a way to raise the rear end of a motorcycle, a way to break the old chain, a chain rivet flaring tool that can be rented in some cases and a Torque wrench.
Skills wise, you will need you must be able to remove the rear wheel, you are capable of removing chain links, and you have the ability to join chain segments.
- First of all, remove the countershaft cover to get at the front sprocket first. It will probably have a sheet metal safety tab that keeps the big nut from loosening up, so you'll have to stick a slot screwdriver between the nut and tab and straighten it out.
- Then you'll need to stick a piece of wood, like a 2x4, between the rear wheel spokes and going over the swing arm so you can undo the big nut holding the countershaft sprocket onto the transmission countershaft.
- If the rear wheel has wire spokes instead of cast aluminium spokes, you'd better have a friend stand on the rear brake pedal.
- The big nut will be about 1-1/4 inches or whatever the metric equivalent is, so you'll need the correct sized socket, a 1/2" drive extension, and ratchet handle with a long extension pipe or a big torque wrench.
- Once that nut is loose enough, you can go to the motorcycle's back end and loosen the rear axle bolt and the chain tension adjuster bolts.
- If you have a riveted type chain, you can use a chain riveting tool to press it out, or you can grind the ends of the rivets off and push the old master link out of the chain with a drift, or you can pry it out with a slot screwdriver.
- Then you can whip the old chain off the motorcycle and throw it into the trash can.
- Pull the rear axle out and clean up the wheel with solvent and dab some wheel bearing grease into the bearings after prying the dust seals out with a small radio screwdriver.
- The rear sprocket will be attached to the sprocket carrier by nuts on studs, and there will probably be sheet metal safety tabs on them too, which will have to be unbent before the nuts can be loosened.
- After removing the old sprocket and laying the new sprocket in place, you can reinstall and torque the nuts to the specification provided in your manual, and you'll probably be able to salvage the safety tabs.
- Reinstalling the wheel requires muscle or brains. The rear wheel is heavier, so you can roll the wheel up onto a block of wood to support it while sliding the greased axle through the holes in the bearings and the swingarm and the adjusters.
- Install the new countershaft sprocket onto the transmission shaft and hammer the sprocket safety tab flat so that it can be used again.
- Then slide the safety tab on and screw the nut onto the shaft finger tight.
- Now, wrap the new chain around the sprockets and install the master link.
- Make a preliminary adjustment of the chain to get most of the slack out of it before torquing the big nut onto the transmission shaft and bending the safety tab over the nut.
- Then make a final adjustment of slack on the chain and reinstall the rear brake caliper.
Pro-tip with torque wrenches, never use them for loosening things, and always store them at 0nm.
Also, make sure that you get the wheel back on straight. Cracking the axle nut can be difficult if you don't have a breaker bar, but any pole will do. When you're putting the wheel back on, you will want to have it adjusted as far as you can.
Remember that after you've aligned it all, tightening up the axle nut might put your alignment off in the right side forward direction (as in, the wheel will point to the left if you were looking at it standing behind the bike).
How to increase/decrease speed & acceleration with sprockets
Basic maths behind adjusting your acceleration and speed with the change of sprocket or, more specifically, the number of teeth in your front and rear sprocket is like, any increase in the rear sprocket teeth or decrease in front sprocket teeth will result in increasing your acceleration and lowering your top-speed.
On the contrary, any increase in the front sprocket teeth or decrease in rear sprocket teeth will result in increasing your top speed and lowering your acceleration.
Higher gearing or low gearing ratio means to more closely match rear-wheel speed to transmission shaft speed, resulting in lower engine RPMs, higher potential top speed and improved fuel economy. The tradeoff is reduced throttle response and acceleration.
Lower gearing or high gearing ratio delivers more rotation of the rear wheel for each spin of the countershaft, thereby raising engine RPMs and improving throttle response for quick acceleration. The compromise is lower top speed and fuel economy.
To calculate the gearing ratio, you can divide the number of teeth on the rear sprocket by the number of teeth on the countershaft sprocket.
Also, keep in mind that the weight of the sprocket also alters your top speed and acceleration. Check the user experiences for the effect of a heavy sprocket on the motorcycle.
User experience:
"I'm not a big fan of the +1/-2, especially when I got a massive acceleration benefit with a 520 conversion, race lite chain, and the super lite sprockets, stock sizes. Also, increasing the countershaft teeth and decreasing the rear sprocket teeth will cause greater tension on the chain. Sure, I may have to change it sooner than later over a 530 set, but my engine will thank me for it with quite a few extra 1000 miles when it's not running 2000-3500 RPM extra for the same speed, and I still get massive gains off the line."
"I did a +1/-2 with a 530 sprocket which is thicker, heavy and more durable. I also did a little research (checked gearing commander) regarding RPM's difference in 6th gear, which is not that huge. 580 RPM at 100 km/h and 700 rpm at 120 km/h. That's where I'm going to be cruising around, and it seems pretty reasonable. I lose some top speed (going from 234 down to 210), but that's something that has little importance to me. I was even thinking of +2/-2 but decided that was going too far."